Steps To Make Partitions in Windows 10 With Disk Management
You can follow the steps written below if you want to make partitions in Windows 10 With disk management for free. This tool is 100% free.
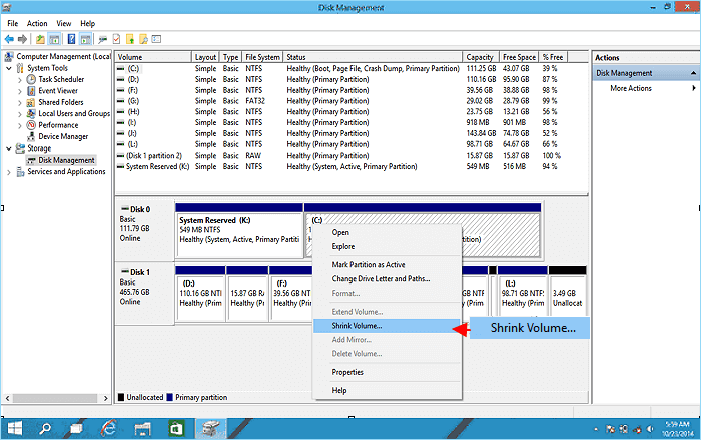
Head to Start Menu/ Search Tool Search “hard disk partitions” Enter the Windows 10 Disk Management interface Right-click the hard disk option select “Shrink Volume”
After that, enter the amount of space you want to shrink in MB as shown below. Afterward, click on the “Shrink” button.
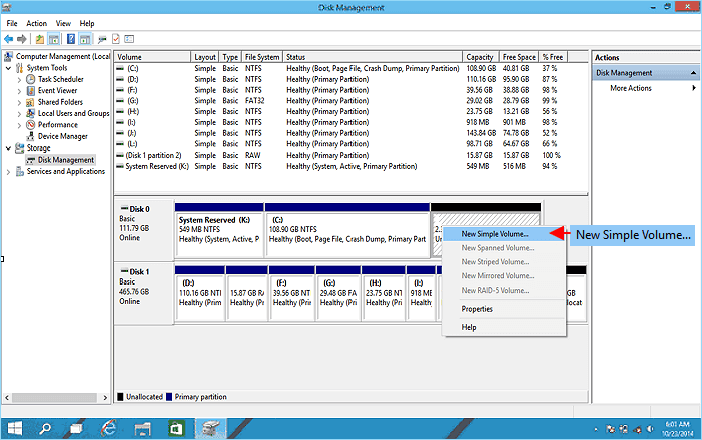
Right-click on the unallocated space Select “New Simple Volume”
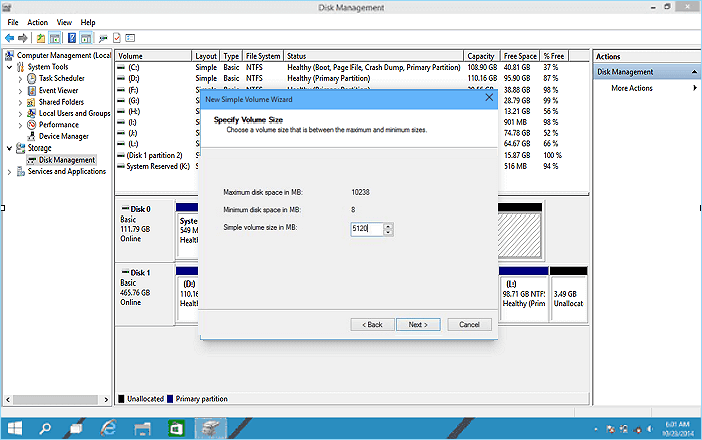
Click Next Specify Volume Size Enter the New Simple Volume Wizard interface
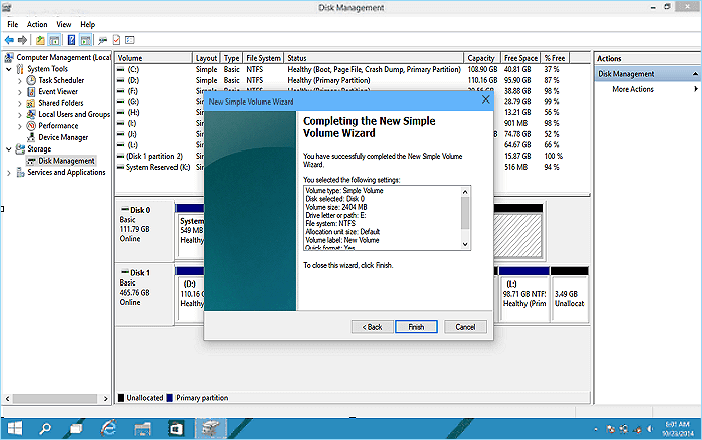
Assign the Drive Letter or Path Then format the partition into NTFS, the default file system Click Finish Here You Go You have completed creating a new partition in Windows 10
Furthermore, you can follow the same steps to create more partitions. These partitions can store and keep your personal files and folders. Moreover, they can organize your Windows 10 laptop or PC more efficiently. In addition to that, you can also download Partition Management Software in order to make partitions. So, If your computer has only one partition now, you can create more partitions on Windows 10 for better management of your data. This will help you organize and manage all the important files. However, Do remember to backup important data before you do any operation to your hard disk drive or Windows 10 partition. Otherwise, such operations may damage your files or data. According to the latest reports, Google Chrome for Window 10 will receive a native dark mode for Windows desktops. In addition to that, Google was also spotted creating a dark theme for the Chrome browser for macOS Mojave. Furthermore, Chrome is going to add a comfortable Web browsing experience on Windows machines with native dark mode support, especially in low lighting conditions. Source: easeus
